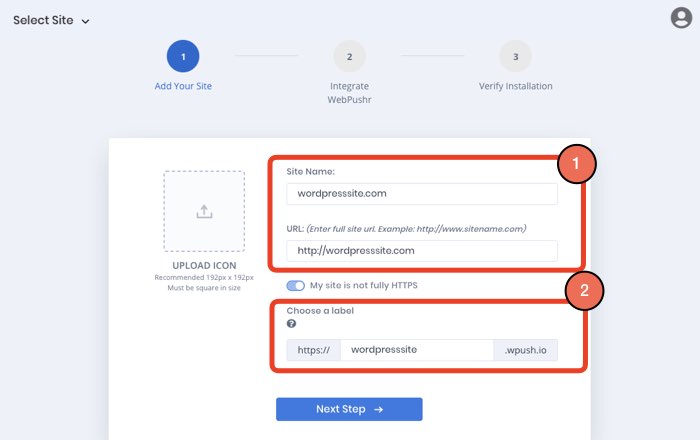
Step 1: Add Site in Dashboard
Add your new site in Webpushr Web Console by entering following two:
Site Name. This is the name of your site.
Site URL. URL to your homepage.
Site Label (HTTP Only). We will create a custom subdomain on HTTPS for you to get subscriber information and send push notifications. This is needed because web push notifications are only supported by HTTPS sites.
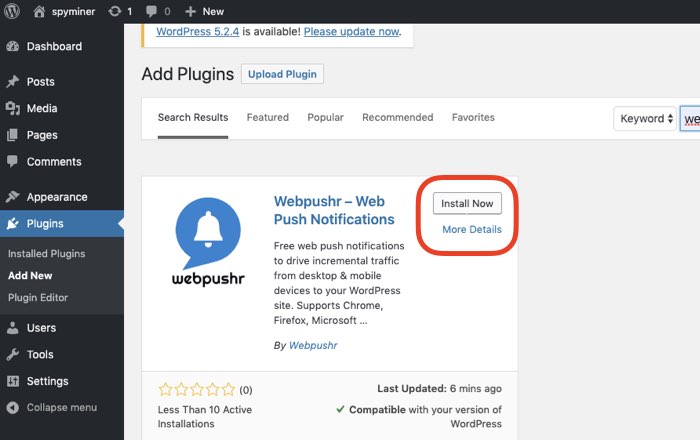
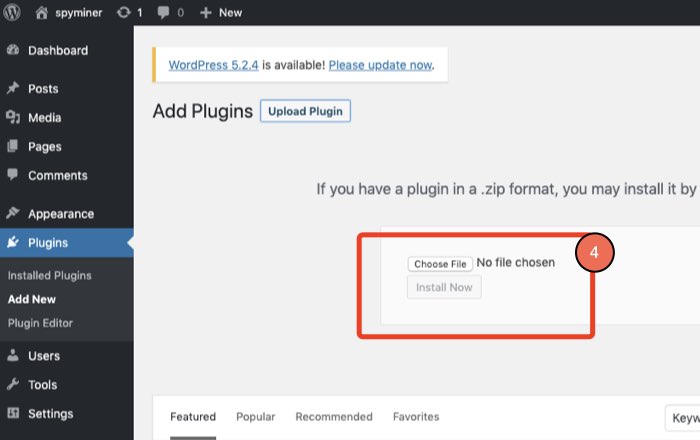
Step 2: Download and Install Wordpress Plugin
Method 1: Wordpress Plugin Directory
You can install Webpushr plugin directly from Plugin > Add New within your WordPress dashboard, as shown below.
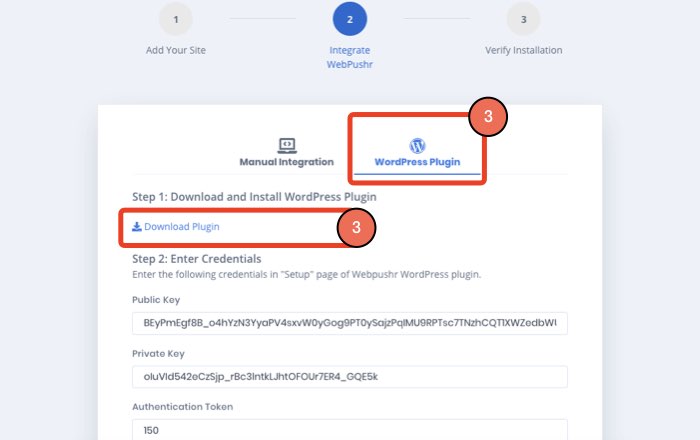
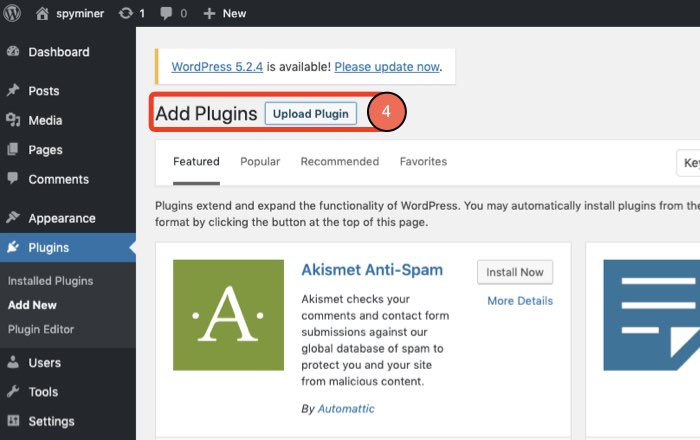
Method 2: Manual Download & Install
You can download our plugin right after you add a site and then manually install it as shown below:
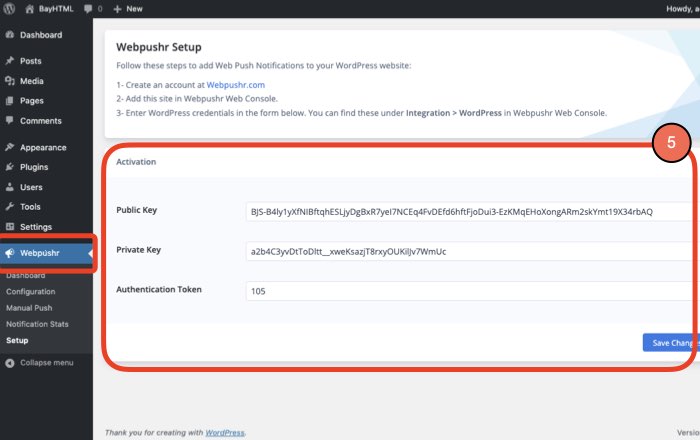
Validate Integration with our troubleshooter
You can use our Integration Troubleshooter to test integration.